Get Started with Documents
Design Documents (also called Documents) hold specifications, API requests, and tests. They also offer the capability to sync with Git.
If you’re looking for information about Collections instead (which use Version Control Sync), see Request Collections.
For this guide, create an empty Document from your Dashboard. We’ve named our Document “petstore” as our example uses the Pet Store API.
Tab Overview
We’re going to start in the Design tab. We’ll walk through each tab in order from left to right, starting with the Design tab.

Documents have functionality separated into three tabs: Design, Debug, and Test.
Tab functionality is as follows:
- Design: Import and edit specifications, see API overview content, and preview a rendering of the API.
- Debug: Create, edit, and send individual requests. Organize your requests into folders. View request responses.
- Test: Create test suites and individual tests for requests. Run tests individually or as a group. View test results.
Design Tab
The Design tab is the first of three top-level tabs in Documents. Import your specification on this tab.
Add Your Specification
We’re going to import a sample file that’s built into Insomnia. Click on start from an example (above the Import button), which will populate the sample Pet Store API.
The Pet Store specification will populate in the center panel of the Design tab. In this panel, you can directly edit the specification.
Alternative Option: Rather than use the sample Pet Store API file, you can import from a file or URL. In the center panel of the Design tab, you’ll see an Import button. This dropdown allows you to select between a File or URL. For a file, select the file to import from your computer. For a URL, provide the URL where the specification file lives. Otherwise, if you’re starting from scratch, you can start typing right into the center panel.
Linting and Error Messaging
All specifications imported into Insomnia are linted, and error messages will appear at the bottom of the center panel. If there are breaking errors, the right- and left-side panels will not render.
Error details include the error type, line number, and error message.
 For error specifics, see the bottom of the center panel.
To replicate the error in the screenshot above with the Pet Store API example, delete “tags:” from line 15. You should see the same errors arise.
Add line 15 back to move forward with this guide.
Left Panel Sections
In the left-side panel, a menu populates with the sections in the table below. Modify what appears in your left-side panel by clicking on the three-dot button next to INFO. By default, all defined sections are visible, and INFO is always visible.
If a section has no content, the section title will not populate. For example, the Pet Store API specification that we’re working with doesn’t have SECURITY defined, so SECURITY won’t appear in the left-side panel.
All of this content is generated from your specification. If you want to make modifications to the generated left-side panel content, modify your specification.
| Section | Description |
|---|---|
| INFO | Overview data about the API, including title, description, version, and license. This section is always visible. |
| SERVERS | Servers that access requests for the API. |
| PATHS | All paths available for the API, with request types listed. |
| REQUESTS | API objects with content types. For example, in the Pet Store API, an object is Pet and content types for that object are application/json and application/xml. |
| RESPONSES | Listing of structured, expected responses for each request. |
| PARAMETERS | Listing of parameters that the API recognizes. |
| HEADERS | Header types accepted by the API. |
| SCHEMAS | Schemas detailing the input/output of the API. |
| SECURITY | Authentication information and options. |
Let’s move on to the Debug tab, where we’ll get to send individual requests.
Debug Tab
The Debug tab is the second of the three top-level tabs in Documents. Any requests detected from your specification (imported on the Design tab) will appear in this tab, given that the specification doesn’t contain fatal errors.
Autogenerated Requests
If you’ve imported a properly formatted specification in your Design tab, you’ll see a list in the left-side panel of your Debug tab.
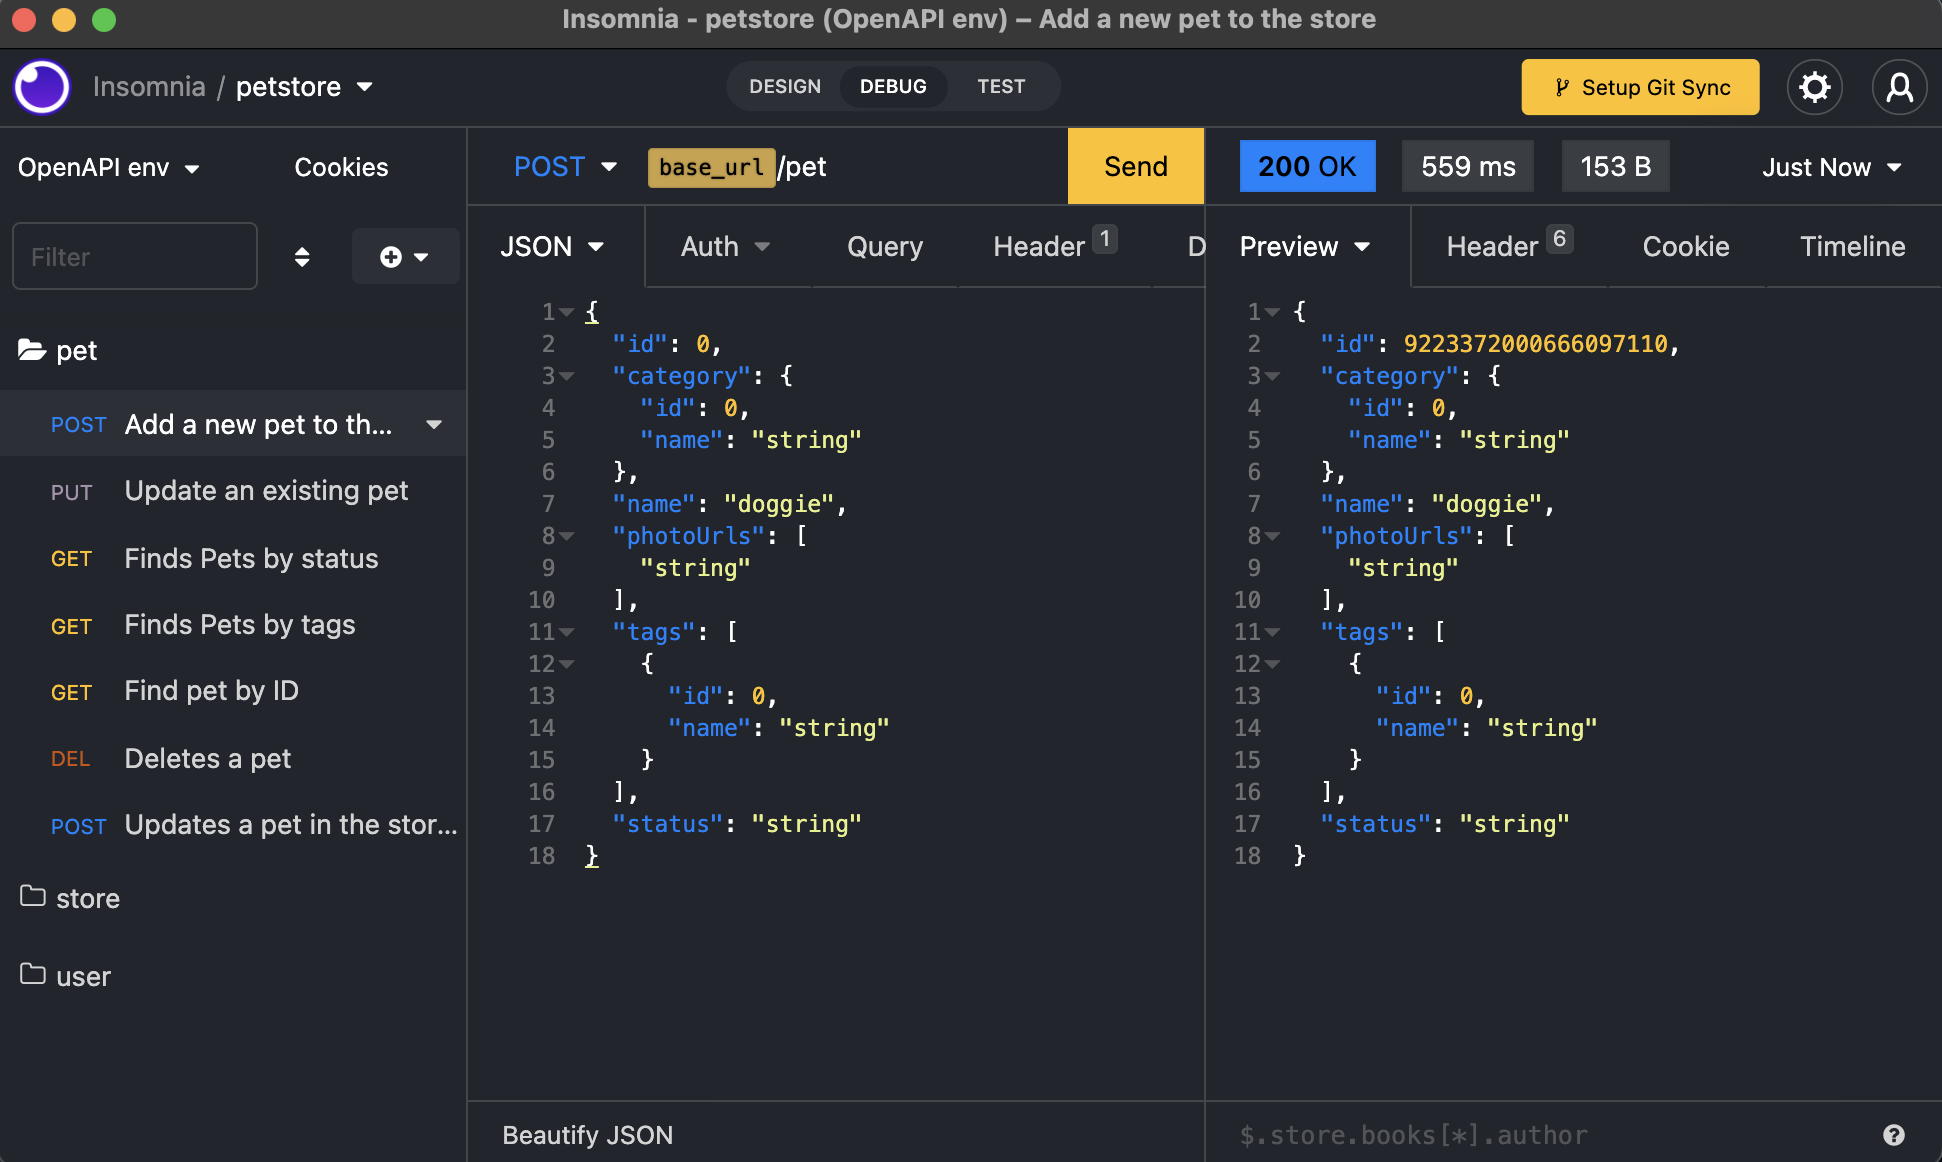 In the left-side panel, you’ll see a list of requests generated from your properly formatted specification.
Click on any request. The center panel will populate with the request URL, request type, base URL variable (defined through the OpenAPI specification), and a body (if application).
Click Send and see the response in the right-side panel.
For more information about sending requests, see Requests.
Test Tab
The Test tab is the third of the three top-level tabs in Documents. Create tests for the requests populated from your specification in this tab.
Let’s write a 200 passing test for the Pet Store API.
- Navigate to the Test tab.
- Click New Test Suite, since all tests must belong to a Suite.
- Name your Test Suite in the modal, then click Create Suite.
- Your Test Suite name will appear in the left-side panel. If you click on the Test Suite name, you’ll get a dropdown menu with options to Run Tests and Delete Suite.
- In the center panel, click New Test next to your Test Suite name.
- Enter a name for your Test in the modal, then click New Test. In this example, we’ve named our test “Returns 200” since we expect the Test to pass with a 200 code.
- Your Test will appear in the center panel. Select a request from the dropdown menu. We’ve selected
pet /[GET] Finds Pets by status. - Click on the right-facing arrow next to your Test, or click Run Tests. The right-facing arrow next to an individual Test sends a single request. The Run Tests button sends all Tests in the center panel at once.
Test results appear in the right-side panel alongside the time it took to complete the request.
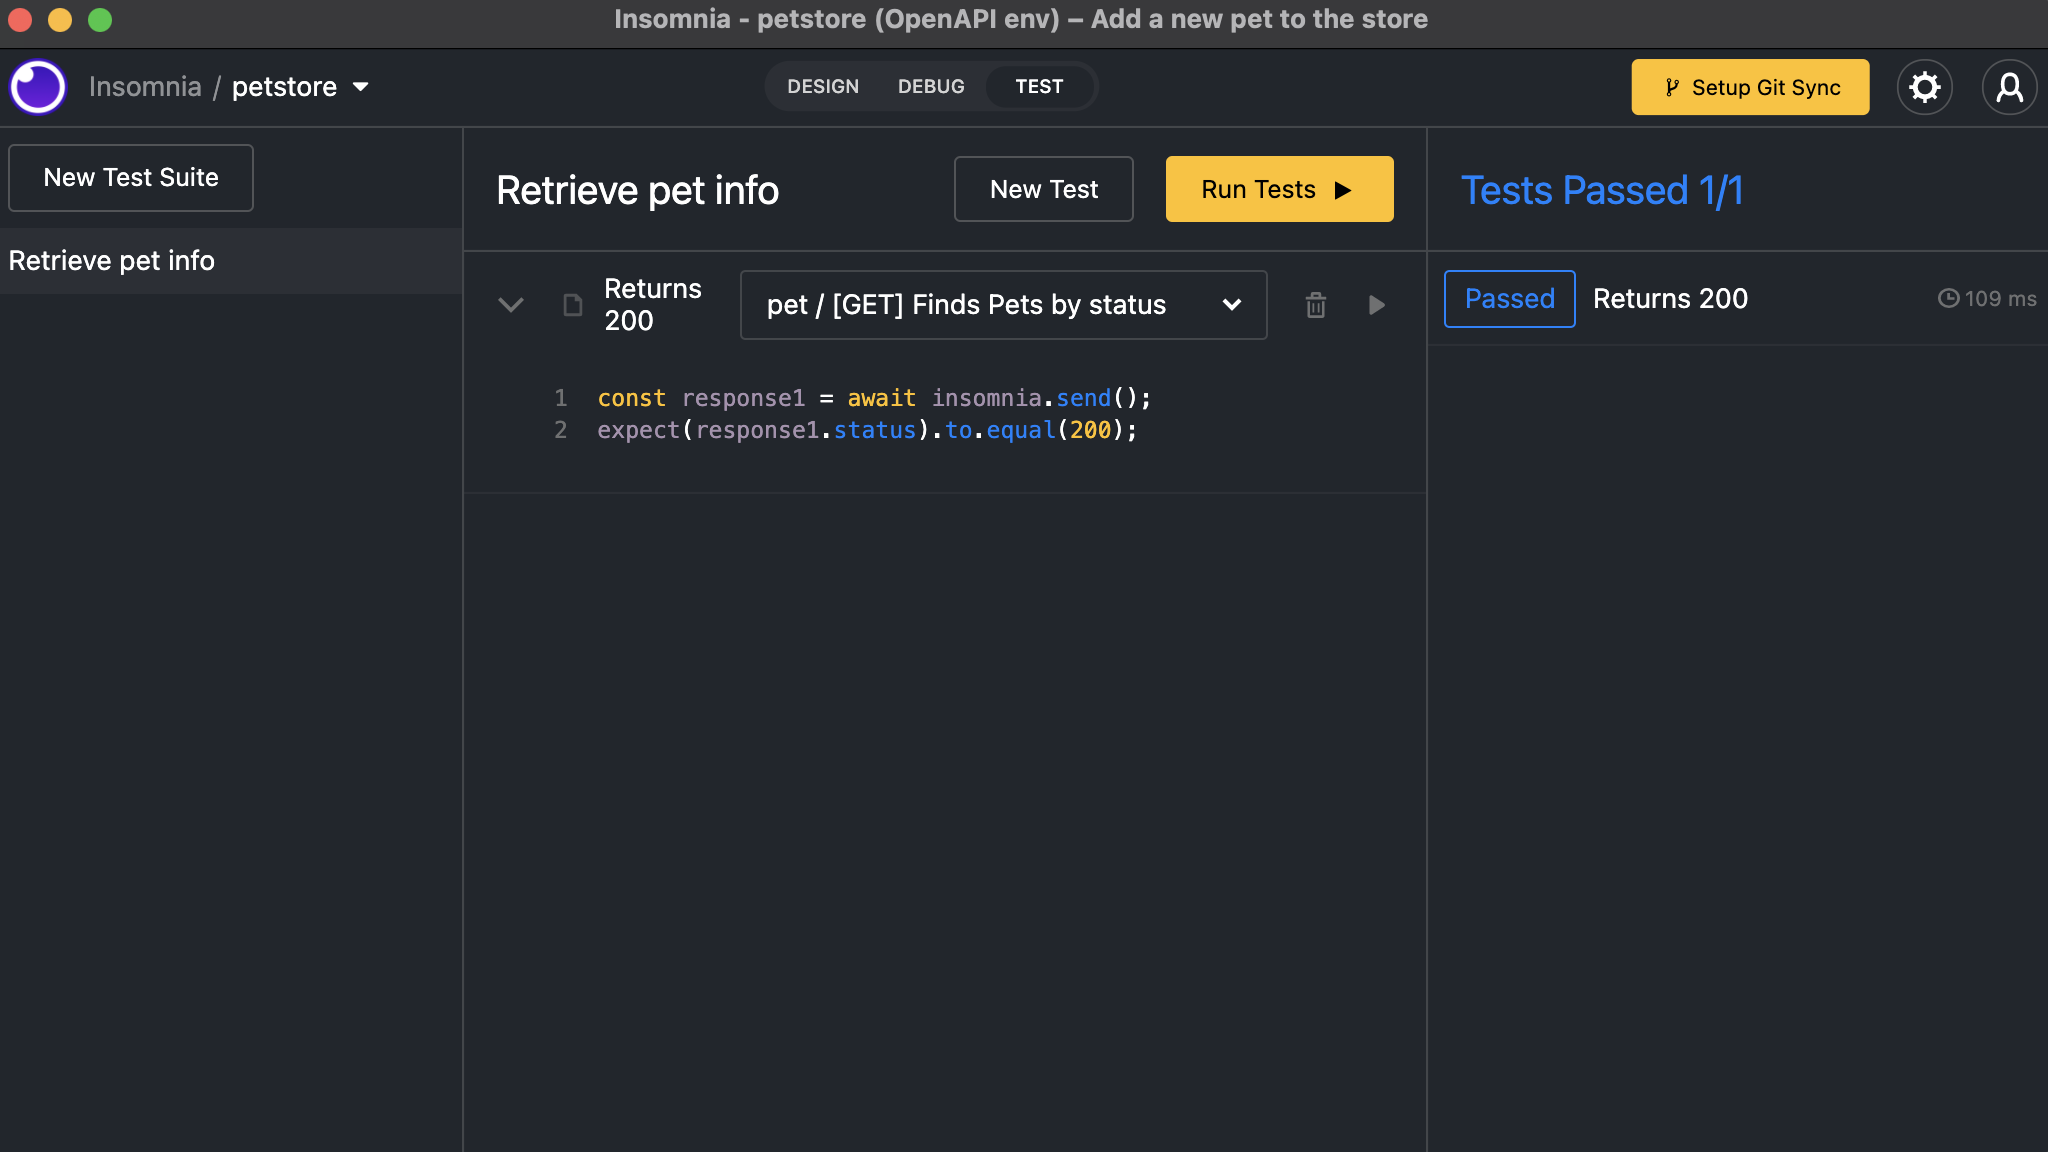 The Test tab displays Test Suites in the left-side panel, Tests in the center panel, and Test results in the right-side panel.
To learn more about Unit Testing, see Unit Testing.
Next Steps
To set up Git Sync, see Sync with Git.
To set up environments, see Environment Variables.
To learn about cookies, see Cookie Management.
For more information on how to modify Documents, see Design Documents.